Home Screen Quick Actions with the Composable Architecture
iOS offers the ability for applications to add quick actions to the home screen icons. Implementing this feature often requires things that are not easy to access in most common App architectures. In this post I want to show you how The Composable Architecture makes it very easy to implement without sacrificing your code.

Implementing Quick Actions is quite straightforward from an API perspective. UIApplication has a shortcutItems array property that you just need to assign when you want to set the quick actions. It really doesn’t get simpler than that.
Note that you can also define quick actions statically in your Info.plist. But here we’re focusing on dynamically updating them which is the most common case.
The shortcut item itself is a simple object with an initialiser where you pass the data you want to display: title, subtitle and icon. You need to define a type so you can later differentiate between different kinds of actions. And finally, as many other iOS APIs, it offers a userInfo dictionary where you can set any custom data that you want.
As you can see the API itself is quite simple to use. The inconvenience of is given by the your specific use case and architecture of choice. As any good architecture out there you probably have multiple features or screens completely decoupled between them. What one screen does shouldn’t affect any other random screen. And that glorious benefit is a small issue to overcome on these situations.
To know when to update the quick actions, and which ones to display, you need to detect some changes on the data of the user. These changes can happen from different features of your application and thus complicating a bit this code that needs to know about all of them.
If you’re lucky you may have a database. And then you can make sure that any change that provokes the quick actions to be updated is saved into database. Or at least that you inform the system with a notification. And then you also need to make sure to never forget about those things when adding more features!
As you can see, there are solutions of course, but you start relying on external systems or compromises on your architecture.
The beauty of the composable architecture is that its centralised design of state and actions makes implementing features like this a breeze. But it’s also fully composable so you are not sacrificing the decoupling between features. And by using functional concepts like high order reducers you can plug and play this functionality without affecting the rest of your app.
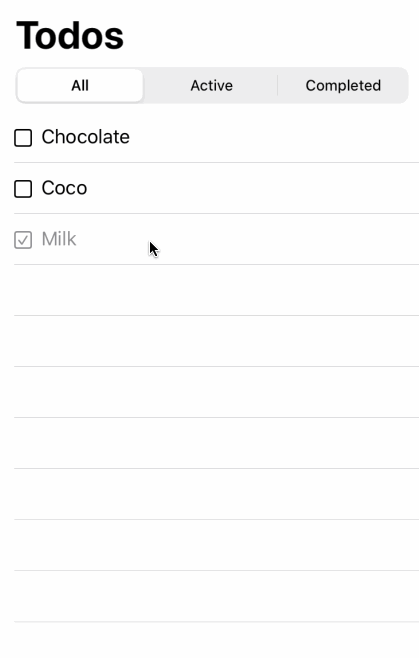
To show case this I’m gonna use one of the amazing example projects that comes with the composable architecture library: Todos.
Updating the shortcuts
Let’s start by creating a new file called QuickActions.swift. I like to have everything that is needed for a feature like this to work in a single file.
import UIKit
import ComposableArchitecture
The first thing we need to add in the file is a definition for a new high order reducer.
High order reducers are like any other reducer you make in your application with the difference that work generically. They’re just like a high order function.
extension Reducer {
    func quickActionable() -> Reducer {
        ...
    }
}
But this reducer is completely generic. We don’t have any information about the state or the actions. To solve that we need to use Swift’s generic constraints to restrict this reducer to our application.
extension Reducer where State == AppState, Action == AppAction, Environment == AppEnvironment {
We could definitely make this reducer fully generic and make it work with any application. Read the section below for some words about that.
Now that we have a reducer that has access to our application state we can just chain it in our main reducer.
let appReducer = Reducer {
  ...
}
.quickActionable()
Just with that single line we’ve added a full set of functionality to our app!
Well, now we need to implement it ^^’
Our new function needs to return a new Reducer that adds the work you want. When implementing a high order reducer usually the first thing you want to do is let the reducer chain run and do their normal work. For that we just need to call self and keep the resulting effect around to return it later.
func quickActionable() -> Reducer {
    Reducer { state, action, environment in
        let effect = self(&state, action, environment)
        ...
        return effect
    }
}
Before we write any code for the quick actions we need to tweak the enviornment to give us access to the iOS API. Yes, you could access UIApplication.shared from the reducer but that breaks the pure function nature of a Reducer. It’s a big NO NO.
Since we’re hooking into the appReducer we need tweak its AppEnvironment. You could pass an instance of UIApplication but the best practice is to have closures as properties in your environment. That makes it easier to mock with anything you want. For example you could fatalError() in tests that you want to make sure don’t touch the quick actions, that’s way harder to do if you just inject an object directly.
struct AppEnvironment {
    ...
    var updateQuickActions: ([UIApplicationShortcutItem]?) -> ()
}

// when initialising the environment
updateQuickActions: { UIApplication.shared.shortcutItems = $0 }
With that scaffolding in place we can add our quick actions functionality.
We reach into the state to get the pending tasks and create UIApplicationShortcutItems from them. For now we only care about passing the description of the task and, since we’re not gonna have multiple types of actions, a hardcoded type.
let quickActions = state.todos.elements
    .filter { $0.isComplete == false }
    .map { todo in
        UIApplicationShortcutItem(
            type: "MarkTodoAsDone",
            localizedTitle: todo.description,
            localizedSubtitle: nil,
            icon: nil,
            userInfo: nil
        )
    }
environment.updateQuickActions(quickActions)
And with this we can now add some todos and see how they appear as a quick action.


Handling a quick action
When a user taps in a quick action the system notifies your application in two different ways.
If the app was already launch the SceneDelegate will receive a call to the following method:
func windowScene(_ windowScene: UIWindowScene, performActionFor shortcutItem: UIApplicationShortcutItem, completionHandler: @escaping (Bool) -> Void)
Instead, if the app was closed and the user opened it via a quick action, the information of the shortcut comes as part of the options UIScene.ConnectionOptions.
No matter from which method we get the shortcutItem we can forward it to a private helper method.
private func handleQuickAction(_ shortcutItem: UIApplicationShortcutItem) -> Bool {
This method’s purpose is to send an action to the Store so our reducers can handle it. For that we need to tweak the SceneDelegate in order to have a property that lets us access the store. We also need to add a new action to our AppAction enum.
enum AppAction: Equatable {
    ...
    case handleQuickAction(todoId: UUID)
}
As you can see the new action has an associated value indicating the identifier of the todo that the user selected. To know this information we need to give it to the system when we create the UIApplicationShortcutItem, that’s what the userInfo property is for.
userInfo: [
    "todoId": todo.id as NSSecureCoding
]
But to avoid having to work with string keys from different places of our app, let’s extend UIApplicationShortcutItem to add a computed property that gives us the todo id.
extension UIApplicationShortcutItem {
    static let todoIdKey = "todoId"

    var todoId: UUID? {
        (userInfo?[Self.todoIdKey] as? String).flatMap(UUID.init(uuidString:))
    }
}
...
userInfo: [
    UIApplicationShortcutItem.todoIdKey: todo.id.uuidString as NSSecureCoding
]
Now that we’re passing the todo id trough the shortcut item we can extract it in the scene delegate and send the appropriate action to the Store.
private func handleQuickAction(_ shortcutItem: UIApplicationShortcutItem) -> Bool {
    if let todoId = shortcutItem.todoId {
        ViewStore(store).send(.handleQuickAction(todoId: todoId))
        return true
    } else {
        return false
    }
}
The next step is handling the new action. We could add this logic into our main app reducer but, as I said in the beginning, I prefer to have everything related to this feature in a single place. So instead, let’s ignore the action in the main reducer
case .handleQuickAction:
    return .none
and implement it in our quickActionable reducer.
let effect = self(&state, action, environment)

if case let AppAction.handleQuickAction(todoId: id) = action {
    return .init(value: .todo(id: id, action: .checkBoxToggled))
}

...
To handle the action in this case is quite simple since we just want to mark the task as done. We just forward the id into an already existing action. We also stop the function here because there is no need to update the quick actions since they will be updated as soon as the task is marked as done.
Tests
The first thing worth mentioning is how the tests still pass. We’ve added all this new functionality just by extending our app features without modifying any of them.
Let’s start by preparing a TestStore
func testQuickActions() {
    let store = TestStore(
        initialState: AppState(),
        reducer: appReducer,
        environment: AppEnvironment(
        mainQueue: self.scheduler.eraseToAnyScheduler(),
        uuid: UUID.incrementing,
        updateQuickActions: { ? }
        )
    )
To track what changes we do to the shortcut items we can have a history array keeping track of them. This not only will allow us to check if the correct items are given to the system, but also how many times we change them.
    var quickActionsHistory: [[UIApplicationShortcutItem]?] = []

    let store = TestStore(
        ...
        updateQuickActions: { quickActionsHistory.append($0) } // <--
        )
    )
Now we can just write a series of events that exercise our new functionality.
First we add a new task and check how the quick actions has been modified:
store.assert(
    .send(.addTodoButtonTapped) {
        $0.todos.insert(
            Todo(
                description: "",
                id:  id,
                isComplete: false
            ),
            at: 0
        )
    },
    .do {
        XCTAssertEqual(quickActionsHistory.count, 1)
    },
Now we change the description of the task and check that is reflected correctly in the quick actions.
    .send(.todo(id: id, action: .textFieldChanged("Cookies"))) {
        $0.todos[0].description = "Cookies"
    },
    .do {
        XCTAssertEqual(quickActionsHistory.count, 2)
        XCTAssertEqual(quickActionsHistory[1]?[0].localizedTitle, "Cookies")
    },
Finally we ask the store to handle a quick action and check how it doesn’t change the history immediately, but instead it forwards the job to another action.
    .send(.handleQuickAction(todoId: id)) { _ in
        XCTAssertEqual(quickActionsHistory.count, 2)
    },
    .receive(.todo(id: id, action: .checkBoxToggled)) {
        $0.todos[0].isComplete = true
    },
    .do {
        XCTAssertEqual(quickActionsHistory.count, 3)
        XCTAssertTrue(quickActionsHistory[2]!.isEmpty)
    },
    .do { self.scheduler.advance(by: 1) },
    .receive(.sortCompletedTodos)
)
And with this set of steps we have fully tested our quick actions integration.

One thing to note is that we’re not refreshing the quick actions when the app starts. In theory this wouldn’t be a problem if the example persisted the tasks. But since the example is not doing it, when the app starts it doesn’t have any todos while the system still keeps the old shortcut items.
This is left as an exercise to the reader.
## Alternative
Fully reusable high order reducers open the door to a great deal of reusability. Plug and ’play features that can be shipped as packages. You can see how this would work in the reusable favourites example.
For the feature we have in hand there may be a generic design that could work on any application, but I haven’t found a nice one. If you look at our resulting code you will notice that there is very little generic code in there. Almost everything is tailored to our needs. Yes, you can make a generic reducer. But then you need to inject so much functionality from the outside, that you ended up with a more complex system for very little gain.
That’s why I hope this article shows that there is nothing bad about writing adhoc functionality, even if at first glance one could imagine and desire a more generic approach.
Write the usage code first.
Conclusion
With this example I wanted to illustrate how nice it is to add functionality to an application even when it requires to have access to any feature. And all of it without impacting any of the existing apps logic.
Keep in mind that even if we have access to the entirety of our app state, the composable architecture allows us to break it down in features and compose them into one. So we don’t lose any separation of concerns. In the example you can see how managing the entire list of tasks is separate from managing a single task. It doesn’t get more separated than that!
I hope you enjoyed this article and learned a little bit. If you are curious about the code you can check this diff in GitHub.