Image aspectRatio without frames
Today I spent a couple of hours understanding how SwiftUI aspectRatio modifiers works and how it interacts with Image. It’s a surprisingly simple system, but also one that made me wonder why things worked the way they worked.
Update: Thanks to Ole Begemann I’ve learned more about how
frameworks and updated the ideal solution.
It all started when a colleague made a PR to fix an issue that I raised with an image being distorted. While reviewing the PR, I was surprised to see that the old code already was using aspectRatio and the new code was an ugly mess of ZStack and other seemingly unnecessary things.

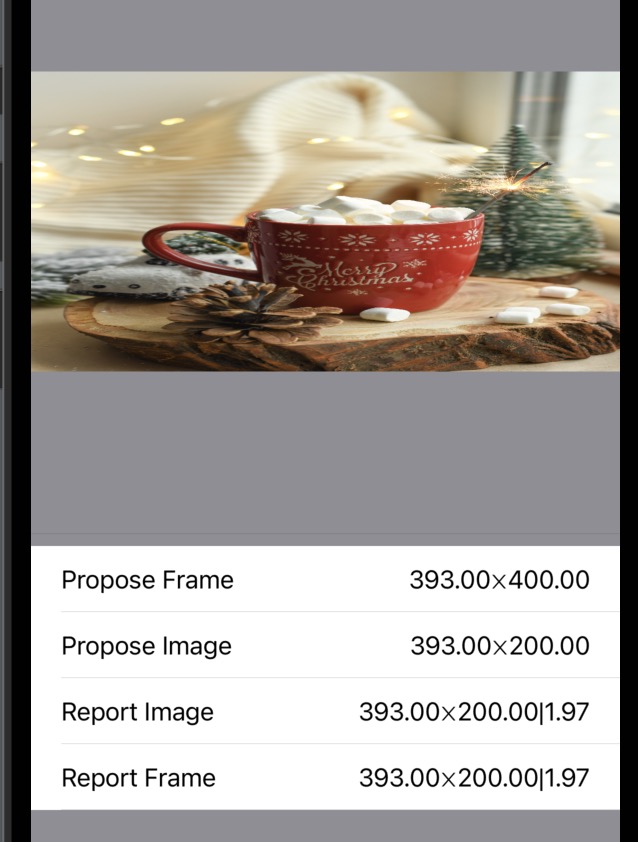
The problem is that using aspectRatio in an Image and giving it a ratio just stretches the image, making it look awful and making the aspect ratio useless.
Image("christmas")
  .resizable()
  .aspectRatio(2, contentMode: .fill)
It’s interesting how all the search results you find are giving you the solution to the most trivial example without getting deep into how things work. The examples about aspectRatio in images are always without the ratio - .aspectRatio(contentMode: .fill) - and using frame or other combinations that solve the issue at hand.
What I would love is for this to behave like UIImageView and it scaled the image properly without stretching. I want to use aspect ratio, without a numeric ratio and specifying no manual size, and let the image render properly without stretching.
But of course that’s now what aspectRatio does!
Of course my curious mind immediately jumped into the code to analyse why there wasn’t a better solution. I was sure there was some combination of modifiers that would make it work nicely without ZStack or other hacks. But it seems I was wrong 😑
aspectRatio and the layout process
As with many modifiers in SwiftUI, it is important to realise that they do not really apply any behaviour to the views. It’s not like we are telling the Image “object” to respect the aspect ratio. Nope! We are not setting properties to an object here. So don’t let your mind complicate things and make you think that you.
The aspectRatio modifier is a layout modifier. That means that it takes part in the layout process of SwiftUI. The layout process is quite simple in reality: proposed sizes go down the hierarchy and taken sizes go up doing the positioning with them.
Armed with some tools from Swift Talk I debugged for a while the behaviour of the modifier to confirm my mental model. This is something I do a lot, even if I think I know how things should work, I want to make sure my mental model is correct. And I dig deeper and deeper until I’m satisfied, when I can’t come up with more questions that could shake my mental model.
Note that I’m just giving a frame of 393x400 to avoid the
VStackprobing multiple times.
Let’s start with the problematic example:
Image("christmas")
    .resizable()
    .logSizes("Image")
    .aspectRatio(2, contentMode: .fit)
    .logSizes("Ratio")
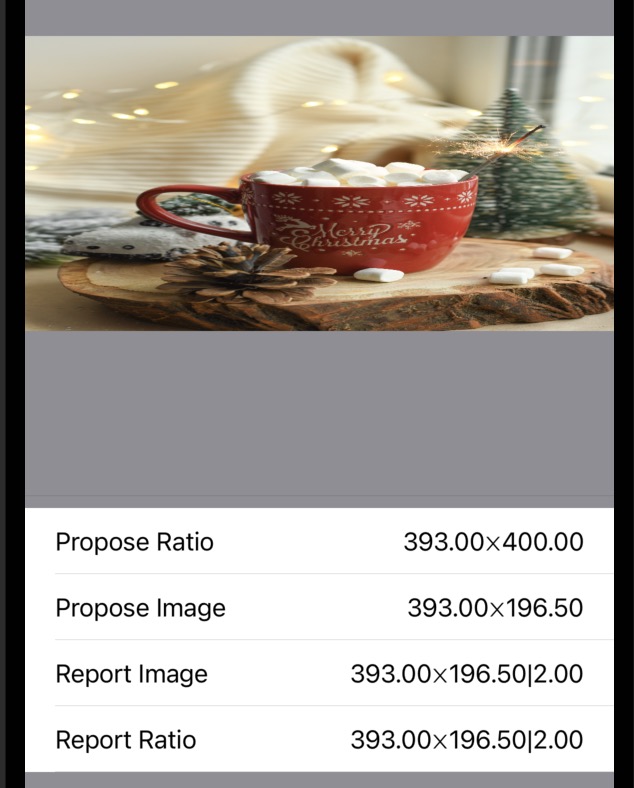
You can see how the aspect ratio receives a size, it computes an appropriate size respecting the ratio and passes that down to the image. The image accepts that size and just renders itself in it. If we change it to fill the behaviour is the same, with the difference that the sizes are bigger.
Now let’s try without giving a ratio at all, just telling the modifier to fill.
Image("christmas")
  .resizable()
  .logSizes("Image")
  .aspectRatio(contentMode: .fill)
  .logSizes("Ratio")
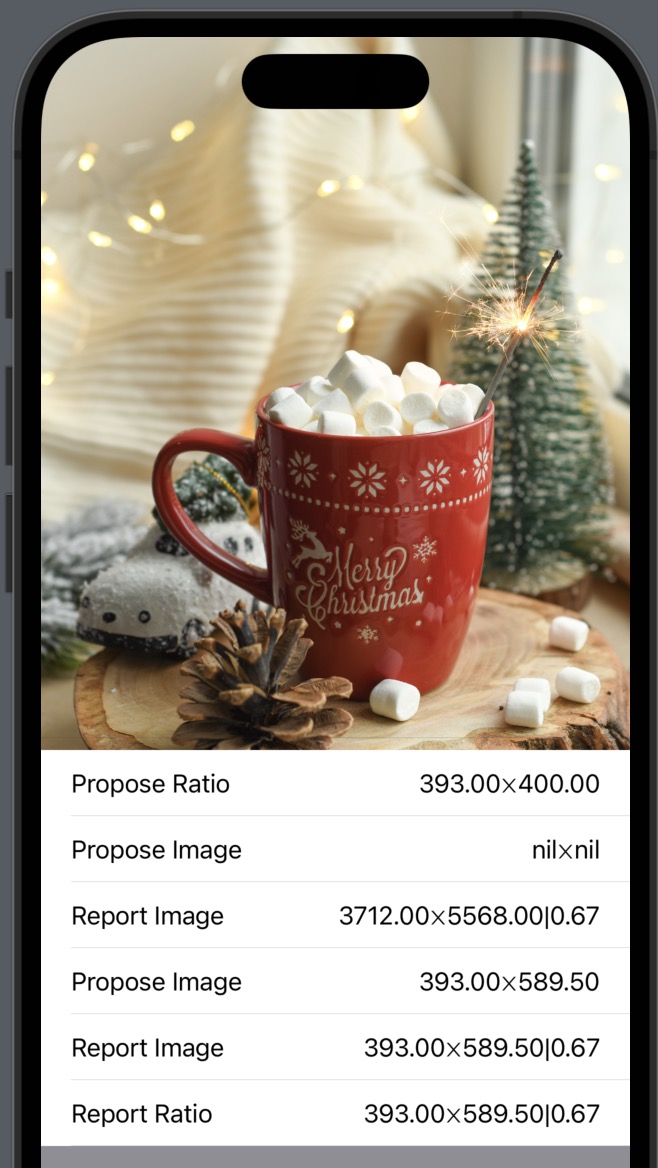
Now we can see how the image is correctly filling the available space without stretching. But if you look at the layout logs, you can see what happens in reality. Is not that the image is magically avoiding stretching (like UIImageView did), it’s that the image receives a proper size that doesn’t make it stretch. The aspect ratio modifier does some probing this time to find the correct size that matches the algorithm. And again, the just renders itself in that size, nothing else.
So by now I thought that it made sense. The aspect ratio modifier is just changing the proposed size that is passed down and the image just renders itself according to that size, filling all pixels on that space, not caring if that results in stretching at all.
This explains why so many examples provide a frame and not a ratio, which defeats the purpose of dynamic UIs. So the solution my colleague proposed was on the right track: use aspect ratio to compute a “frame” in which to embed the image, and then let the image fill all the space.
Despite that, my brain was like “there must be a way of doing that by chaining modifiers!”…
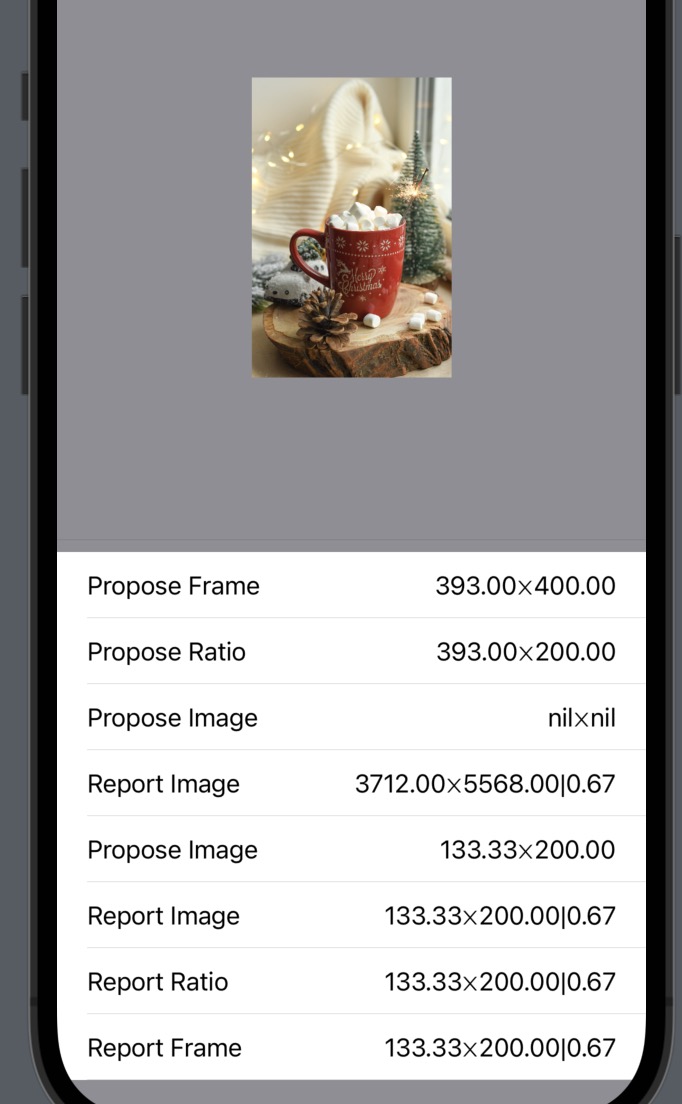
Chaining aspect ratios for science!
So the idea was to keep the aspect ratio of the image without a specific number, and use another parent modifier to create the correct size:
I’m using a square ratio as an example because it is clear to see that the result is wrong, not squared.
Image("christmas")
    .resizable()
    .logSizes("Image")
    .aspectRatio(contentMode: .fill)
    .logSizes("Inner Ratio")
    .aspectRatio(1, contentMode: .fit)
    .logSizes("Outer Ratio")
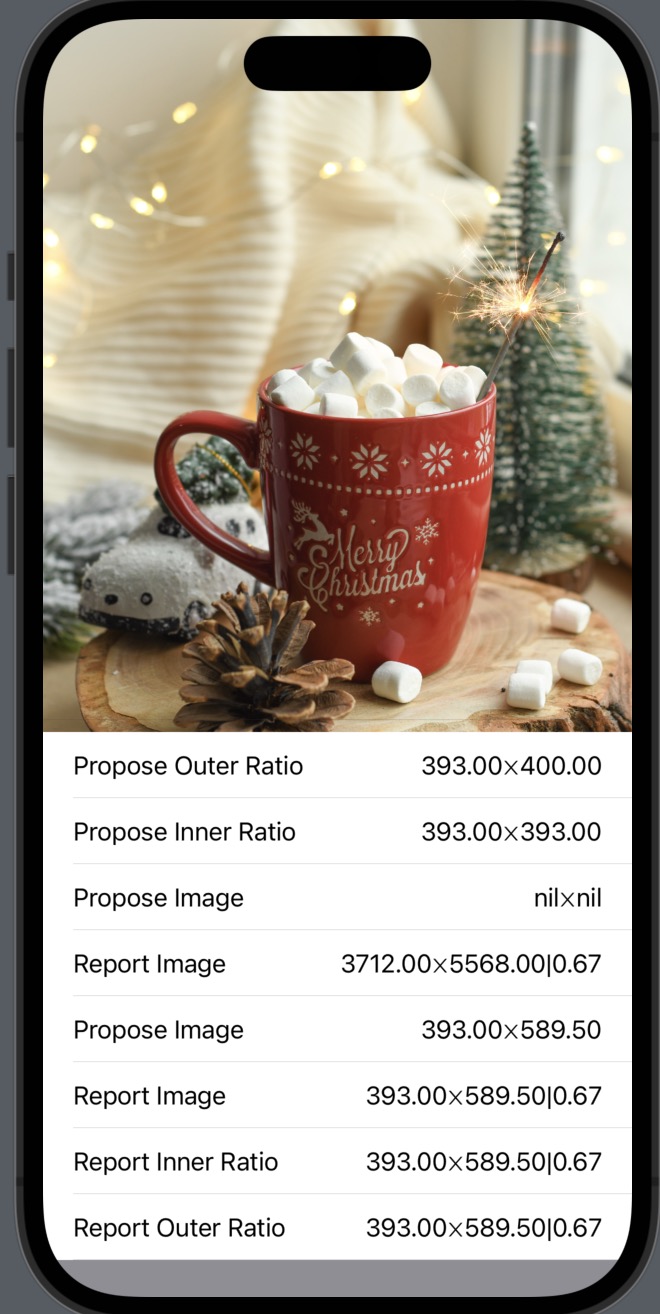
But as you can see that changed nothing.
At this point I added the ratio on the log to see easily if it matched the one I gave.
If you analyze the logs, you can see how the outer modifier changes the size to be a square, but the inner ratio then computes a new size according to its fill rule and is what it uses to probe the image. At the end the result is the same since the image receives that “filled” frame.
Now is when your brain may say “but I specified an aspect ratio of 1, why is that not respected?” and the answer is the same again. The modifier does nothing else than changing the proposed size down. The child’s view is free to ignore that and pick another size, which is reported upwards. And when the layout system goes up, there is no correction. The aspect ratio modifier won’t force the reported size of the child to be a ratio of 1.
You can see it easily if we use a frame instead:
Image("christmas")
    .resizable()
    .logSizes("Image")
// .aspectRatio(contentMode: .fill)
    .frame(width: 100, height: 300)
    .logSizes("Inner Ratio")
    .aspectRatio(1, contentMode: .fit)
    .logSizes("Outer Ratio")
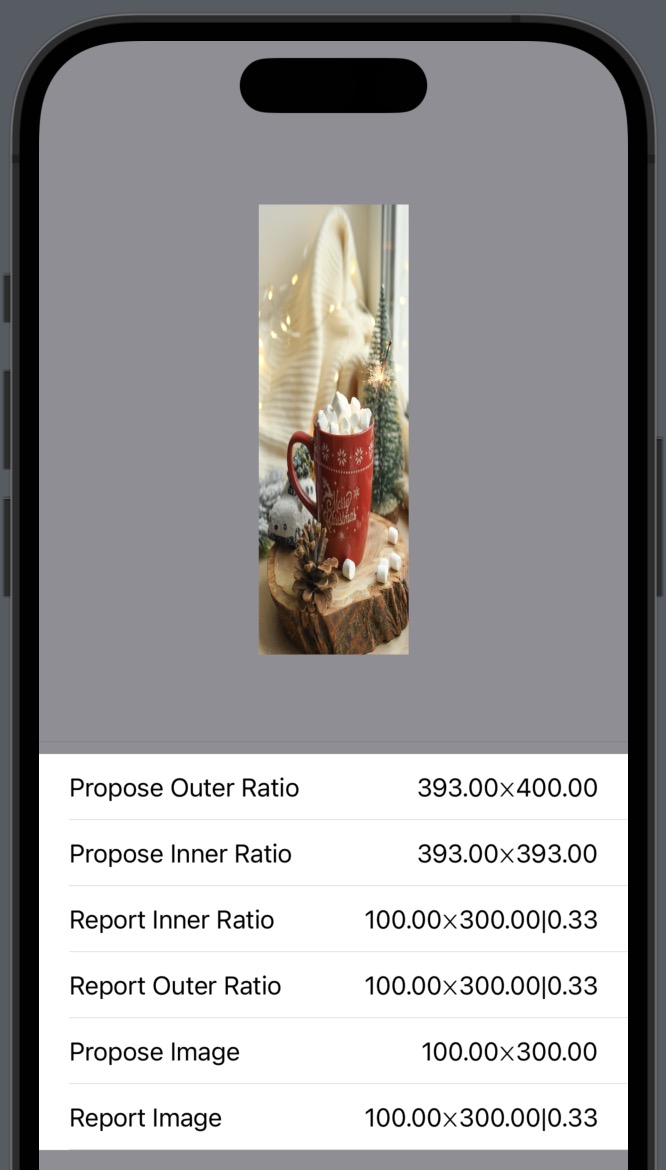
You can see how the frame picks the size ignoring the parent aspect ratio proposed size, and the aspect ratio can’t do anything about it. Again, proposed sizes go down, and selected final sizes go up positioning along the way. Nothing more. Is really that simple.
The simple common scenarios
As a side note, let’s look at why the common examples used to teach aspect ratio for images work.
Usually the examples start by showing you how images get stretched:
Image("christmas")
    .resizable()
    .frame(height: 200)
    .logSizes("Image")
We can see here how the frame proposes a size to the image and this one just takes it and renders itself, resulting in obvious stretching.
Then the solution proposed is usually to just use the aspect ratio, without a number, to fix it:
Image("christmas")
  .resizable()
  .logSizes("Image")
  .aspectRatio(contentMode: .fit)
  .logSizes("Ratio")
  .frame(height: 200)
  .logSizes("Frame")
This of course fixes the stretching. Now the aspectRatio probes the image to know its aspect ratio, then computes the correct size giving the constraints, and proposes that to the image to just render itself in it.
But of course you are fixing the sizes which is totally against any modern, adaptable design.
And just for completeness, try to use fill instead:
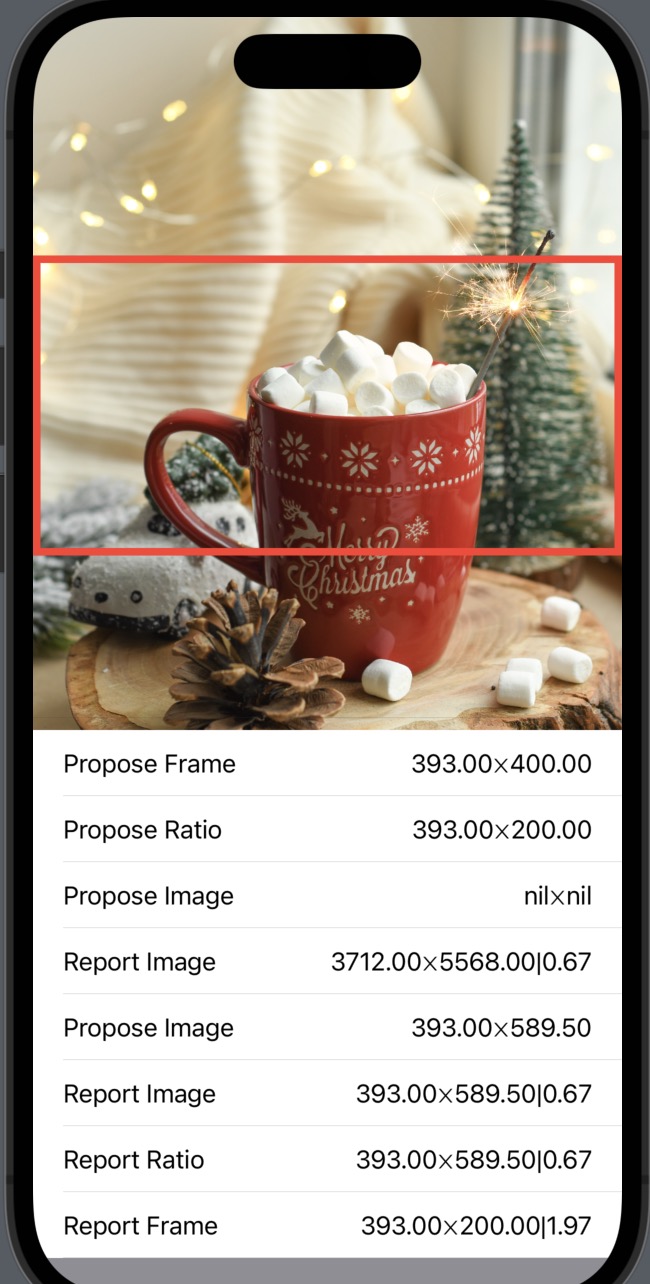
That’s even more annoying because the image draws out of bounds, you need to clip it. But take the opportunity to understand why that happens. The aspect ratio still probes the image for its desired ratio, and uses it to calculate a correct size using a filling algorithm, which makes the size bigger. That report goes up until it find the frame. The frame cannot do anything about it, again the layout process going up is just about positioning, but is stubborn and returns the fix size you gave it. That means the layout outside thinks is 200 but the image rendered way bigger than that.
Image rendering is the culprit
At this point I tried many combinations, but I was just distracting myself, learning along the way and reaffirming my mental model yes, but there was no solution on the horizon. Things worked as they should. The aspect ratio modifier just proposes an appropriate size, that’s it.
The issue here is that the image rendering is quite dumb. As soon as you do resizable it just means the image will render all the pixels filling the entire size that is given to it. That makes sense but is annoying given the circumstances. That modifier has a resizingMode that would make you hope it was the solution but no, it’s just to change between stretching and tiling. I think that if you could tell that mode to be fitting or filling it would mimic more my expectations.
Solution
UPDATE: See below for a better solution using frames.
So what’s the solution? Sadly, we need to break the hierarchy in two.
First create a “frame” by constraining the size to a specific desired ratio.
Rectangle()
  .aspectRatio(2, contentMode: .fit)
Then, embed the image inside that frame and use another aspect ratio to give it the proper size. We also need to clip the result since using fill will make the image draw of out of bounds as explained above.
Note that I’m using an
overlayinstead of aZStack. Prefer to use overlay or background instead of ZStacks when is semantically more appropriate.
Rectangle()
  .aspectRatio(2, contentMode: .fit)
  .overlay {
      Image("christmas")
          .resizable()
          .aspectRatio(contentMode: .fill)
  }
  .clipped()
Since this is a bit cumbersome to do, I thought it would be nice to have a reusable modifier for it. But that comes with more questions around API design so feel free to do whatever is more appropriate for your codebase. I just give you my current take as a suggestion:
extension View {
    func framedAspectRatio(
        _ ratio: CGFloat? = nil,
        contentMode: ContentMode
    ) -> some View {
        Color.clear
            .aspectRatio(ratio, contentMode: .fit)
            .overlay {
                self
                    .aspectRatio(contentMode: contentMode)
            }
            .clipped()
    }
}
With this modifier at hand the result doesn’t seem that bad:
Image("christmas")
    .resizable()
    .framedAspectRatio(2, contentMode: .fill)
A better solution with frames
After posting this post, Ole Begemann replied on Mastodon with a better solution and some insight on how frame works. It turns out I was not that far when I suspected that there was a way to break the layout in two separate frames. After all, the modifiers in Swift are virtually creating nested views. What I missed is a special behaviour of the frame modifier. It’s one of those cases when the answer was in my brain, because I watched Swift Talk, but for some reason I didn’t think about it, 😞 .
The documentation of the modifier says this, emphasis mine:
If no minimum or maximum constraint is specified in a given dimension, the frame adopts the sizing behavior of its child in that dimension. If both constraints are specified in a dimension, the frame unconditionally adopts the size proposed for it, clamped to the constraints.
That’s exactly what I wanted!
Image("christmas")
    .resizable()
    .aspectRatio(contentMode: .fill)
		// this is the magic trick
    .frame(
        minWidth: 0,
        maxWidth: .infinity,
        minHeight: 0,
        maxHeight: .infinity
    )
    .aspectRatio(2, contentMode: .fit)
    .clipped()
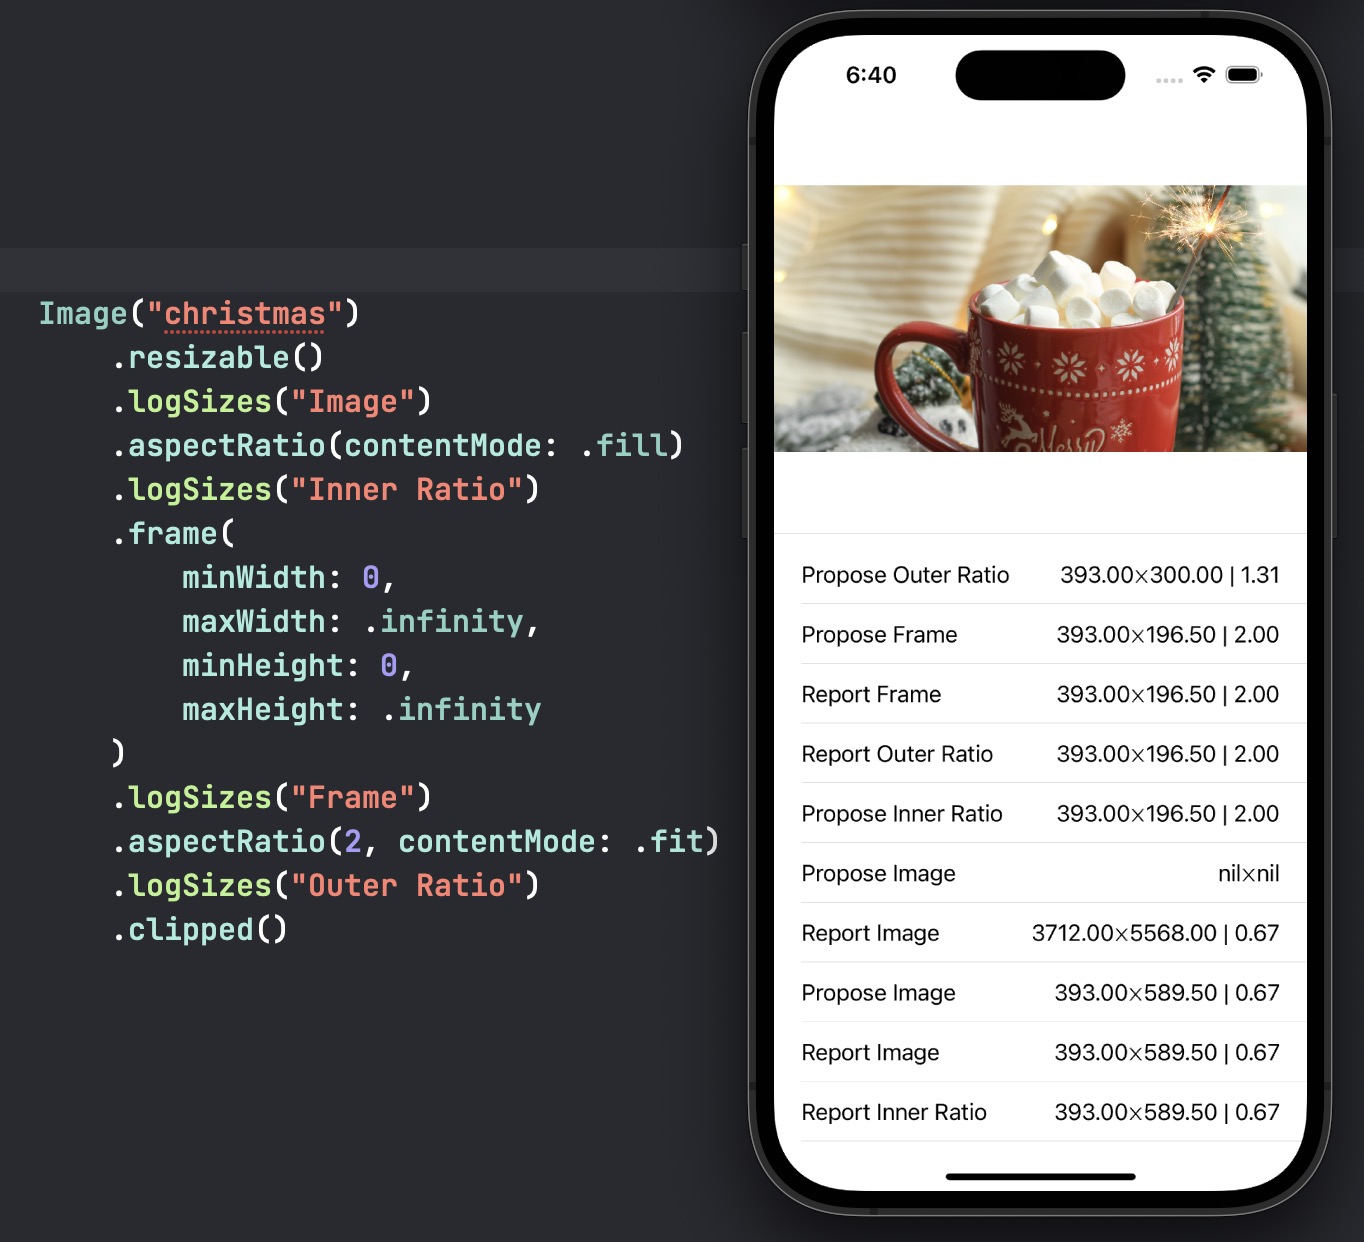
But I have to admit that I’ve spend a few hours trying to fully understand the behaviour of frame. When I was happy understanding what passing both constraints does, I found myself confused because when I passed only minHeight: 0 the behaviour is still the one I wanted!
The diagram from SwiftUI Lab was very useful to understand the documentation in a visual form, but even with that the change of behaviour from following the child size to the proposed size is a bit confusing. I understand the common cases, and it always does what you expect it to do, but… I have to think a bit too much, there is still something confusing me.
Thanks to Ole I now have a better grasp of SwiftUI layout system. I will have to watch some Swift Talk episodes again 😂
Conclusion
I love this puzzles! I like to go deep not really to find a solution, but to make sure I understand what’s going on. At the end of the journey I’m happy to solidify my mental model of how things work, even if the final answer is not very satisfying.
Ultimately though, I hope this post serves not only as an explanation of this behaviour but also as an inspiration to make you go deep and make sure you really understand how things work. So please don’t just copy the final code from the internet, not even from this post!
A final thanks for the guys at Swift Talk for the useful debugging tools and for the great explanations about SwiftUI layout’s system. And to Ole Begemann for giving me not only the solution I desired, but more puzzles to solve. They were crucial to help me form the correct mental model since SwiftUI release ^^
As usual, I could have totally missed something, or a new version of SwiftUI changes things, so please don’t hesitate to reach out to clarify anything 🙏.